Designing your dream home often begins with ideas scattered across your mind—colors you love, furniture styles that inspire you, or patterns you can’t stop thinking about. But without a clear plan, it’s easy for those ideas to feel disorganized. That’s where an inspiration board comes in. Also known as a mood board, this creative tool brings together visuals, textures, and design elements into one cohesive vision.
Whether you’re reimagining a single room or planning a full home makeover, an inspiration board helps you see how all the pieces fit together before making costly decisions. Instead of guessing whether a sofa matches your rug or if a bold paint color will clash with your curtains, you’ll have a visual guide that simplifies choices.
The best part is that creating one is both fun and practical. It allows you to experiment with ideas, explore your creativity, and build confidence in your design decisions—all while keeping your style consistent and your project organized.
Why an Inspiration Board Matters
An inspiration board is more than a collage; it’s a roadmap for your home’s style. With all your ideas in one place, you gain clarity and direction that prevents overwhelm during the decorating process.
One of its biggest benefits is consistency. It ensures that every purchase or design decision ties back to the same overall aesthetic. Instead of mixing random items, you’ll be curating a space that feels intentional and harmonious.
Additionally, an inspiration board sparks creativity. Seeing textures, colors, and furniture side by side often inspires new combinations you wouldn’t have thought of otherwise. And with this tool, you’ll make decisions with confidence, reducing second-guessing at every step.
Key Benefits of an Inspiration Board
- Clarity – Visualize colors and styles before committing
- Consistency – Keep all design choices aligned
- Creativity – Experiment with new ideas in a low-risk way
- Confidence – Shop and decorate without hesitation
- Organization – Store every detail of your vision in one place
Step 1: Define Your Style and Purpose
Every inspiration board starts with a clear goal. Ask yourself: are you focusing on a single room, redesigning an entire home, or experimenting with a seasonal update? The purpose of your board will influence the types of materials and images you choose.
Think about the mood you want to create. Do you imagine a cozy and rustic living room, a sleek and modern kitchen, or perhaps a serene and coastal bedroom? Defining the emotional atmosphere will guide your selections and prevent distractions.
Also, consider whether you’re starting from scratch or working with existing furniture and décor. If you already own pieces you love, they should anchor your board and shape your design direction.
Step 2: Decide on the Format
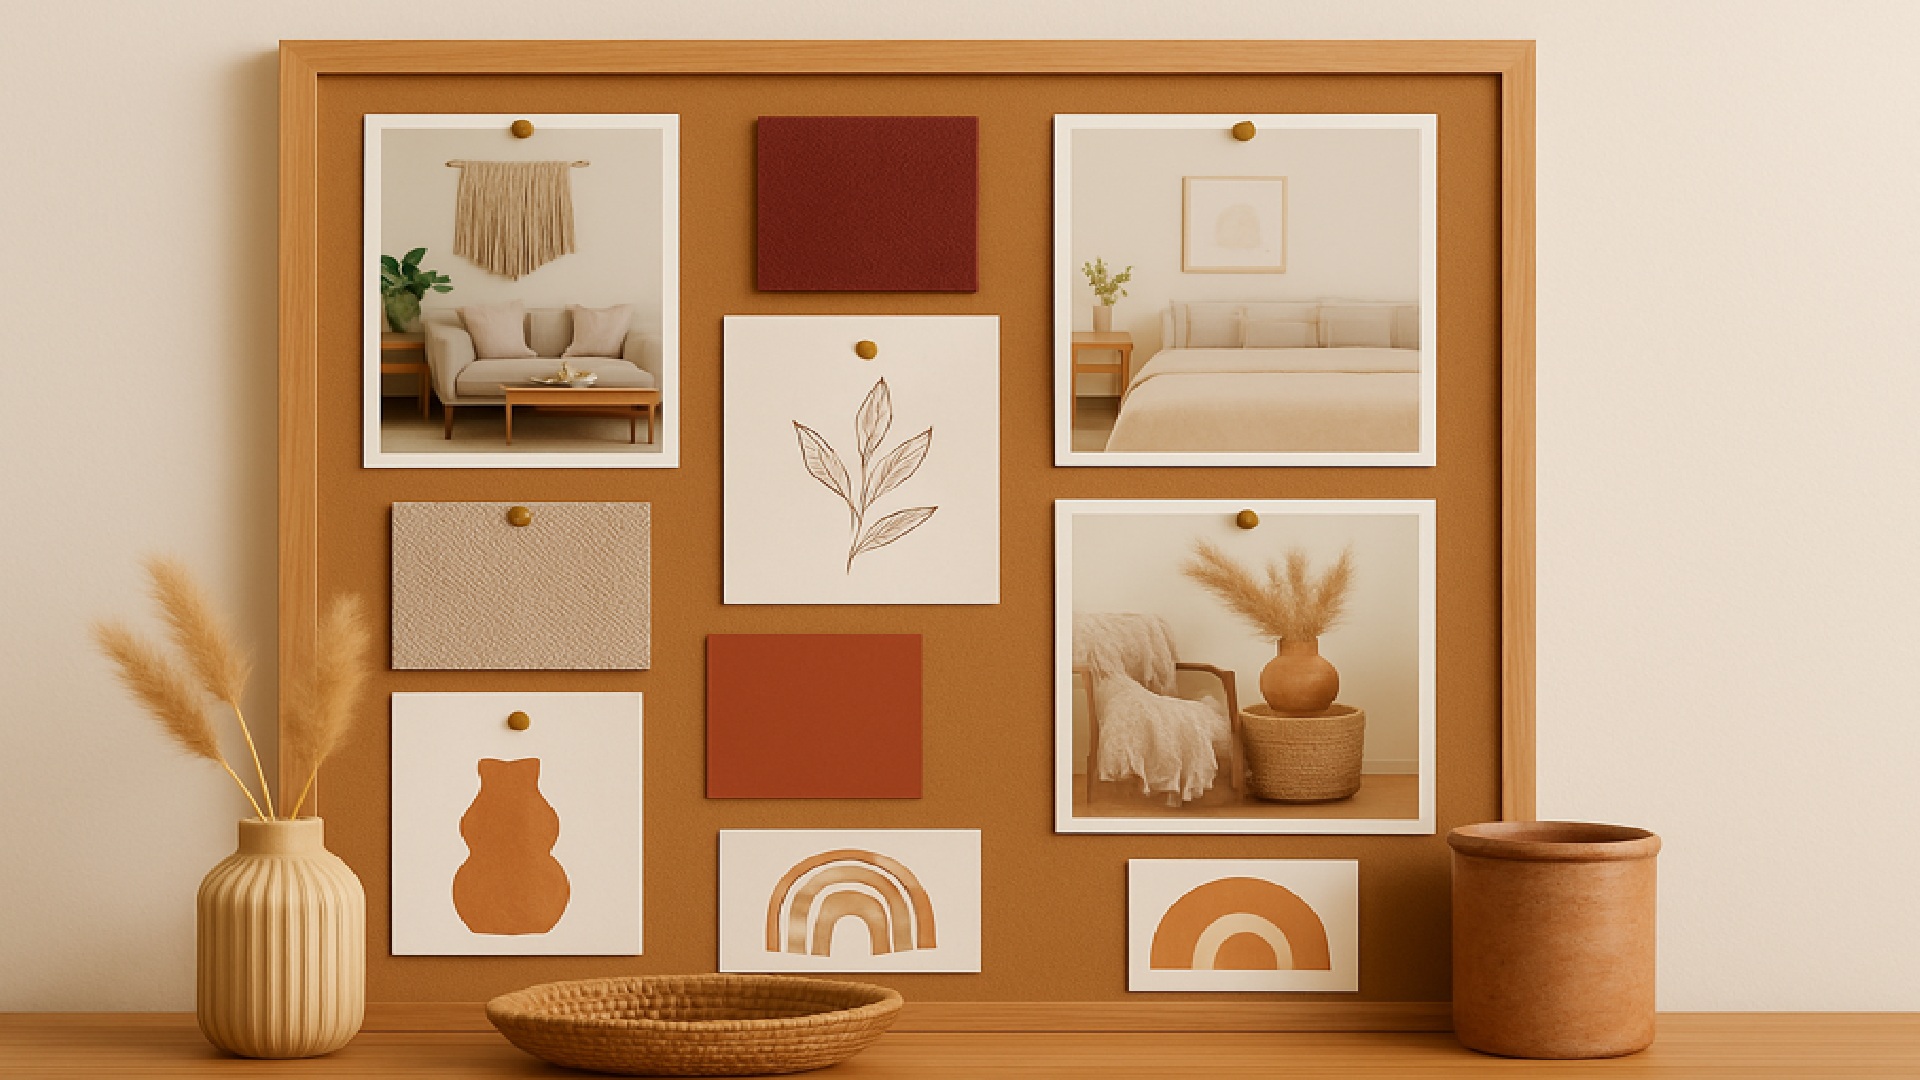
Inspiration boards can be either physical or digital, each offering unique advantages. A physical board allows you to pin fabric swatches, paint chips, and printed photos, giving you a tactile experience that feels hands-on. This is especially helpful when you want to see how textures look together.
Digital boards, on the other hand, are incredibly flexible. Platforms like Pinterest, Canva, or Photoshop make it easy to collect, rearrange, and share your ideas. You can quickly test different layouts without committing to glue or pins.
Many people find that a combination works best: use digital tools to gather broad ideas, then build a physical board with real-world samples for a more tangible perspective.
Step 3: Gather Materials and Visuals
This stage is all about collecting the building blocks of your design. Don’t just focus on furniture—think about all the details that create atmosphere. Gather color swatches, fabric samples, photos of décor items, and inspirational images from magazines or online.
Textures are just as important as visuals. Wood finishes, metal details, and even flooring options should be represented to give your board depth. If your theme includes natural stone, patterned rugs, or matte metals, include those samples as well.
The goal is not to gather everything you like but to curate a collection that works together. Think quality over quantity—your inspiration board should feel cohesive, not cluttered.
Step 4: Choose a Color Palette
Color is the foundation of any design. Selecting a palette early helps prevent mismatches and keeps your project visually unified. A good palette usually consists of a primary color, secondary shades, and accent tones that bring personality.
When deciding, use a color wheel to find harmonious combinations. Also consider how light affects the shades—what looks soft in natural daylight may appear harsh under artificial lighting.
Finally, connect your palette to the emotions you want your space to evoke. Warm tones create coziness, cool tones bring calm, and bold hues energize a room. Defining your palette ensures that every choice, from wall paint to cushions, feels deliberate.
Step 5: Arrange for Flow and Balance
The way you arrange elements on your board affects how easy it is to visualize your design. Start with a central image or main color to anchor the layout, then build around it with supporting visuals.
Grouping similar items—such as fabrics together, lighting together, and furniture together—creates clarity. Keep plenty of space between elements so the board feels breathable, not crowded.
For added balance, arrange items from light to dark or from larger visuals to smaller ones. This makes your board not only functional but also aesthetically pleasing, which is motivating as you move forward.
Step 6: Add Textures and Patterns
Great design isn’t just about what you see—it’s also about what you feel. Adding textures and patterns to your board brings dimension and realism. For instance, contrast smooth glass with rough wood, or pair soft fabrics with structured metal.
Patterns should also be considered carefully. Large, bold prints can serve as focal points, while smaller patterns add subtle detail. Mixing the two creates variety without overwhelming the space.
If you’re working on a physical board, include swatches you can touch. For a digital board, zoomed-in photos of materials work just as well to communicate texture.
Step 7: Highlight Key Furniture and Décor Pieces
No room is complete without anchor pieces—items that set the tone for the space. These could be a statement sofa, a dramatic bed frame, or even a striking chandelier. Place these items prominently on your board to see how they integrate with your palette and textures.
Smaller décor details should also be represented. Side tables, chairs, mirrors, and artwork often tie the room together. Including them ensures your board reflects not just the big vision but also the finishing touches.
With these anchors in place, you’ll find it easier to make confident shopping decisions later.
Step 8: Don’t Forget Lighting
Lighting is often underestimated, yet it has the power to completely transform a room’s atmosphere. Including different types of lighting on your board helps you think beyond furniture and color.
For example, pendant lights can define a dining area, while floor lamps create cozy corners. Wall sconces add elegance, and LED strips bring modern accent lighting. Each option influences mood in its own way.
The key is making sure your lighting style aligns with your overall theme. A rustic board may feature lantern-style fixtures, while a modern one leans toward sleek, minimal designs.
Step 9: Review and Refine
Once your board feels complete, step back and assess it with fresh eyes. Does everything look cohesive? Is there anything that feels out of place? Be honest, even if it means removing an item you love.
Editing is part of the process. By trimming away elements that don’t serve your vision, you’ll strengthen the overall design. This ensures that when you move from planning to execution, your style feels intentional and refined.
Step 10: Use It as a Guide
An inspiration board isn’t just for brainstorming—it’s a practical tool for shopping and planning. Bring it with you to the paint store, furniture showroom, or when meeting with contractors. Having your board on hand prevents impulsive choices that clash with your theme.
It also keeps your project on track. When you’re tempted by a trendy piece, compare it to your board. If it doesn’t fit, skip it. This simple habit saves money and keeps your vision intact.
Inspiration by Popular Themes
If you’re unsure where to begin, try building your board around a theme. Some popular starting points include:
- Modern Minimalist: Neutral tones, sleek furniture, and uncluttered spaces
- Rustic Farmhouse: Warm colors, wood textures, and cozy textiles
- Coastal Retreat: Soft blues, sandy neutrals, and breezy fabrics
- Bohemian Chic: Bold colors, layered patterns, and natural greenery
- Industrial Loft: Exposed textures, metal fixtures, and reclaimed wood
These serve as useful frameworks, but remember: your board should reflect your personality, not just trends.
Final Thoughts
An inspiration board is more than decoration—it’s a design compass. It guides your choices, keeps your style cohesive, and helps you bring your vision to life. By defining your style, curating materials, and arranging them thoughtfully, you transform scattered ideas into a clear plan.
Whether digital or physical, this tool makes home design easier, more enjoyable, and ultimately more successful. With your board as your guide, you’ll create a home that not only looks beautiful but also feels unmistakably yours.