Decorating your home doesn’t have to involve expensive furniture or hiring a professional designer. With a little creativity and a few simple supplies, you can transform your space through DIY crafts that add personality, charm, and warmth. Whether you’re looking to refresh a tired corner, add a handmade touch to your living room, or simply enjoy a fun weekend project, there are countless ways to decorate your home with your own hands.
In this article, you’ll find a collection of easy, beginner-friendly DIY craft ideas that anyone can try. No need for fancy tools or advanced skills — just inspiration, some basic materials, and your personal style.
Why Choose DIY for Home Decor?
Doing-it-yourself isn’t just about saving money — although it certainly helps with that. It’s about making your space feel uniquely yours. Here’s why more people are turning to DIY when decorating their homes:
- Creative expression: You get to design pieces that reflect your personality.
- Custom look: No more cookie-cutter decor — your pieces will be one of a kind.
- Budget-friendly: Many DIYs use affordable or recycled materials.
- Therapeutic value: Crafting is calming, satisfying, and rewarding.
- Personal connection: Your home will tell a story — yours.
Now, let’s dive into some fun and simple craft ideas you can start today.
1. Mason Jar Lanterns
Great for: Bedrooms, patios, hallways, or as centerpieces.
Mason jars are a DIY favorite because they’re versatile, affordable, and charming. You can turn them into lanterns with just a few items.
What you need:
- Mason jars
- Battery-operated tea lights or fairy lights
- Twine or ribbon
- Decorative pebbles, shells, or sand
How to make it:
- Fill the jar’s base with your chosen filler (sand, pebbles, etc.).
- Place the light inside.
- Wrap twine or ribbon around the top and tie in a bow.
- Optional: Paint or frost the jar for a soft glow.
These lanterns are perfect for adding ambiance anywhere in your home.
2. DIY Wall Art with Canvas and Paint
Great for: Living rooms, bedrooms, entryways, and gallery walls.
You don’t need to be a professional painter to make something beautiful. Abstract art, line art, or geometric designs are all beginner-friendly.
What you need:
- Blank canvas or thick cardboard
- Acrylic paints or spray paints
- Brushes, sponges, or tape
- Painter’s tape for shapes
How to make it:
- Use painter’s tape to block off sections or shapes.
- Apply paint however you like — bold brushstrokes, splashes, or gradients.
- Let it dry and remove the tape for clean lines.
- Hang your art with command strips or in a frame.
This is an inexpensive way to fill wall space and express your artistic side.
3. Decorative Rope Baskets
Great for: Bathrooms, living rooms, or closets.
Rope baskets are stylish, neutral, and functional — and yes, you can make them yourself!
What you need:
- Thick cotton rope
- A bowl (as a mold)
- Hot glue gun
- Fabric or felt (optional, for lining)
How to make it:
- Start coiling the rope at the base, gluing as you go.
- Continue wrapping and gluing upward around the bowl.
- Once you reach your desired height, finish the top edge neatly.
- Optional: Add handles or a fabric liner for extra flair.
Use them to store small items, towels, or even as plant holders.
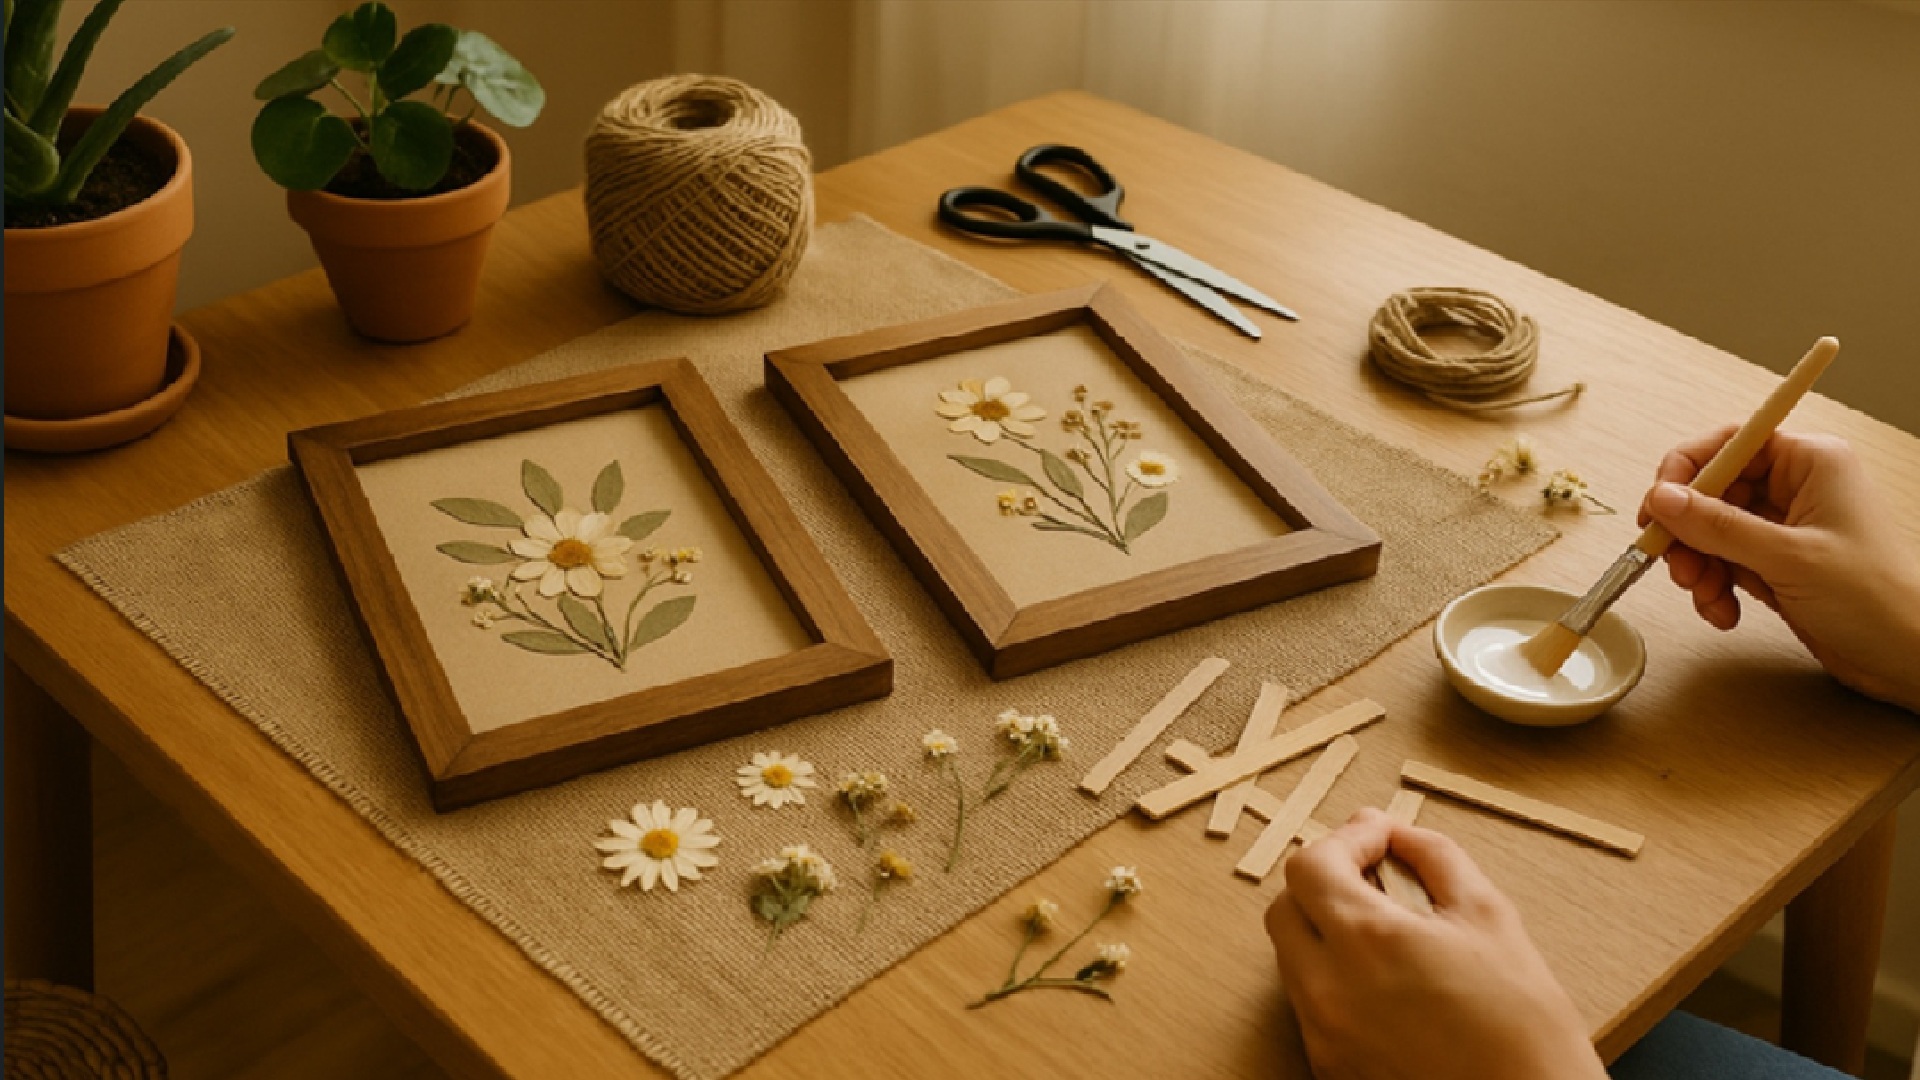
4. Pressed Flower Frames
Great for: Bedrooms, hallways, bathrooms, or gifts.
Bring nature indoors with delicate, beautiful pressed flowers displayed in a frame.
What you need:
- Flowers or leaves (fresh or dried)
- Heavy books or a flower press
- Glass frame or clear acrylic sheets
- Tweezers and paper
How to make it:
- Press flowers between sheets of paper inside heavy books for 1–2 weeks.
- Arrange your flowers between glass panes or acrylic.
- Secure and place in a frame.
- Hang near a window or place on a shelf.
This timeless craft adds a touch of nature and elegance to any space.
5. Painted Plant Pots
Great for: Windowsills, patios, bookshelves, and kitchens.
Give your indoor plants some personality by painting their pots.
What you need:
- Terra cotta or ceramic pots
- Acrylic paint
- Paintbrushes or sponge brushes
- Sealer spray (optional)
How to make it:
- Clean the pots and let them dry.
- Apply base paint, then add designs (stripes, polka dots, abstract art, etc.).
- Let dry completely and apply a sealer if desired.
- Add a plant and display!
This project is perfect for plant lovers and makes excellent gifts too.
6. Fabric Wall Hangings
Great for: Boho, modern, or minimalist interiors.
Wall hangings made of yarn, fabric, or rope can soften your space and add texture.
What you need:
- Wooden dowel or branch
- Yarn, rope, fabric strips, or macramé cord
- Scissors
- Beads or decorative accents (optional)
How to make it:
- Cut yarn or fabric strips to your desired length.
- Tie each strip to the dowel using a lark’s head knot.
- Vary lengths or colors for visual interest.
- Add beads or knots as you wish.
- Hang it on the wall with string or hooks.
It’s easier than it looks, and totally customizable to your color palette.
7. DIY Chalkboard Wall or Board
Great for: Kitchens, home offices, or kids’ rooms.
A chalkboard adds a fun and functional element to your decor. You can use it for notes, drawings, or meal plans.
What you need:
- Chalkboard paint
- Foam roller or brush
- Painter’s tape
- Optional: frame or wood board
How to make it:
- Tape off the area where you want your board.
- Apply 2–3 coats of chalkboard paint.
- Let it dry for 24 hours.
- Prime the board by rubbing chalk all over and erasing.
Write messages, quotes, reminders — or let the kids have fun doodling!
8. No-Sew Pillow Covers
Great for: Couches, beds, reading corners.
If you want to update your throw pillows without sewing, this is the hack for you.
What you need:
- Fabric (old scarves, shirts, or cotton fabric)
- Pillow insert or old pillow
- Fabric glue or safety pins
- Iron-on patches (optional)
How to make it:
- Cut fabric to fit your pillow, leaving extra for overlap.
- Fold and glue or pin the edges like you’re wrapping a present.
- Add patches or embellishments if desired.
- Flip it over — instant refresh!
Change your pillow covers with the seasons or whenever you need a new look.
9. Upcycled Picture Frame Trays
Great for: Coffee tables, bedrooms, or entryways.
Turn an old picture frame into a stylish tray to hold candles, books, or keys.
What you need:
- Old photo frame (with glass)
- Handles (drawer pulls work well)
- Screwdriver or strong glue
- Decorative paper or fabric for the base
How to make it:
- Remove the back of the frame and add your paper/fabric under the glass.
- Reattach the backing.
- Screw or glue on the handles.
- Place it on a table to organize decor items.
This adds sophistication to your decor with almost no effort.
Final Tips for DIY Decorating Success
- Start small: Choose quick, low-stress projects to build confidence.
- Work with what you have: Repurpose old items before buying new ones.
- Match your style: Use colors and textures that align with your existing decor.
- Enjoy the process: DIY is as much about the journey as the result.
- Use what’s around you: Nature, thrift stores, or even your recycling bin can provide materials.
Final Thoughts: Handmade Home, Heartfelt Decor
Decorating your home with DIY projects is a fun, empowering way to bring life and creativity into your space. From lanterns to wall hangings, each handmade item adds more than beauty — it adds meaning. You’re not just filling a room; you’re shaping an environment that reflects who you are.
Start with one project this weekend. You might be surprised at how much joy — and beauty — a little crafting can bring.